前言
公司正在开发一个商城项目,因为项目需要,做了一个仿拼多多的地址选择器,但是与拼多多实现方法有些出入,大体效果是差不多的。
(2019年04月22日更新)最后决定还是单独提取出来做个demo给大家参考参考,地址:https://github.com/cyixlq/AddressPickerDialog
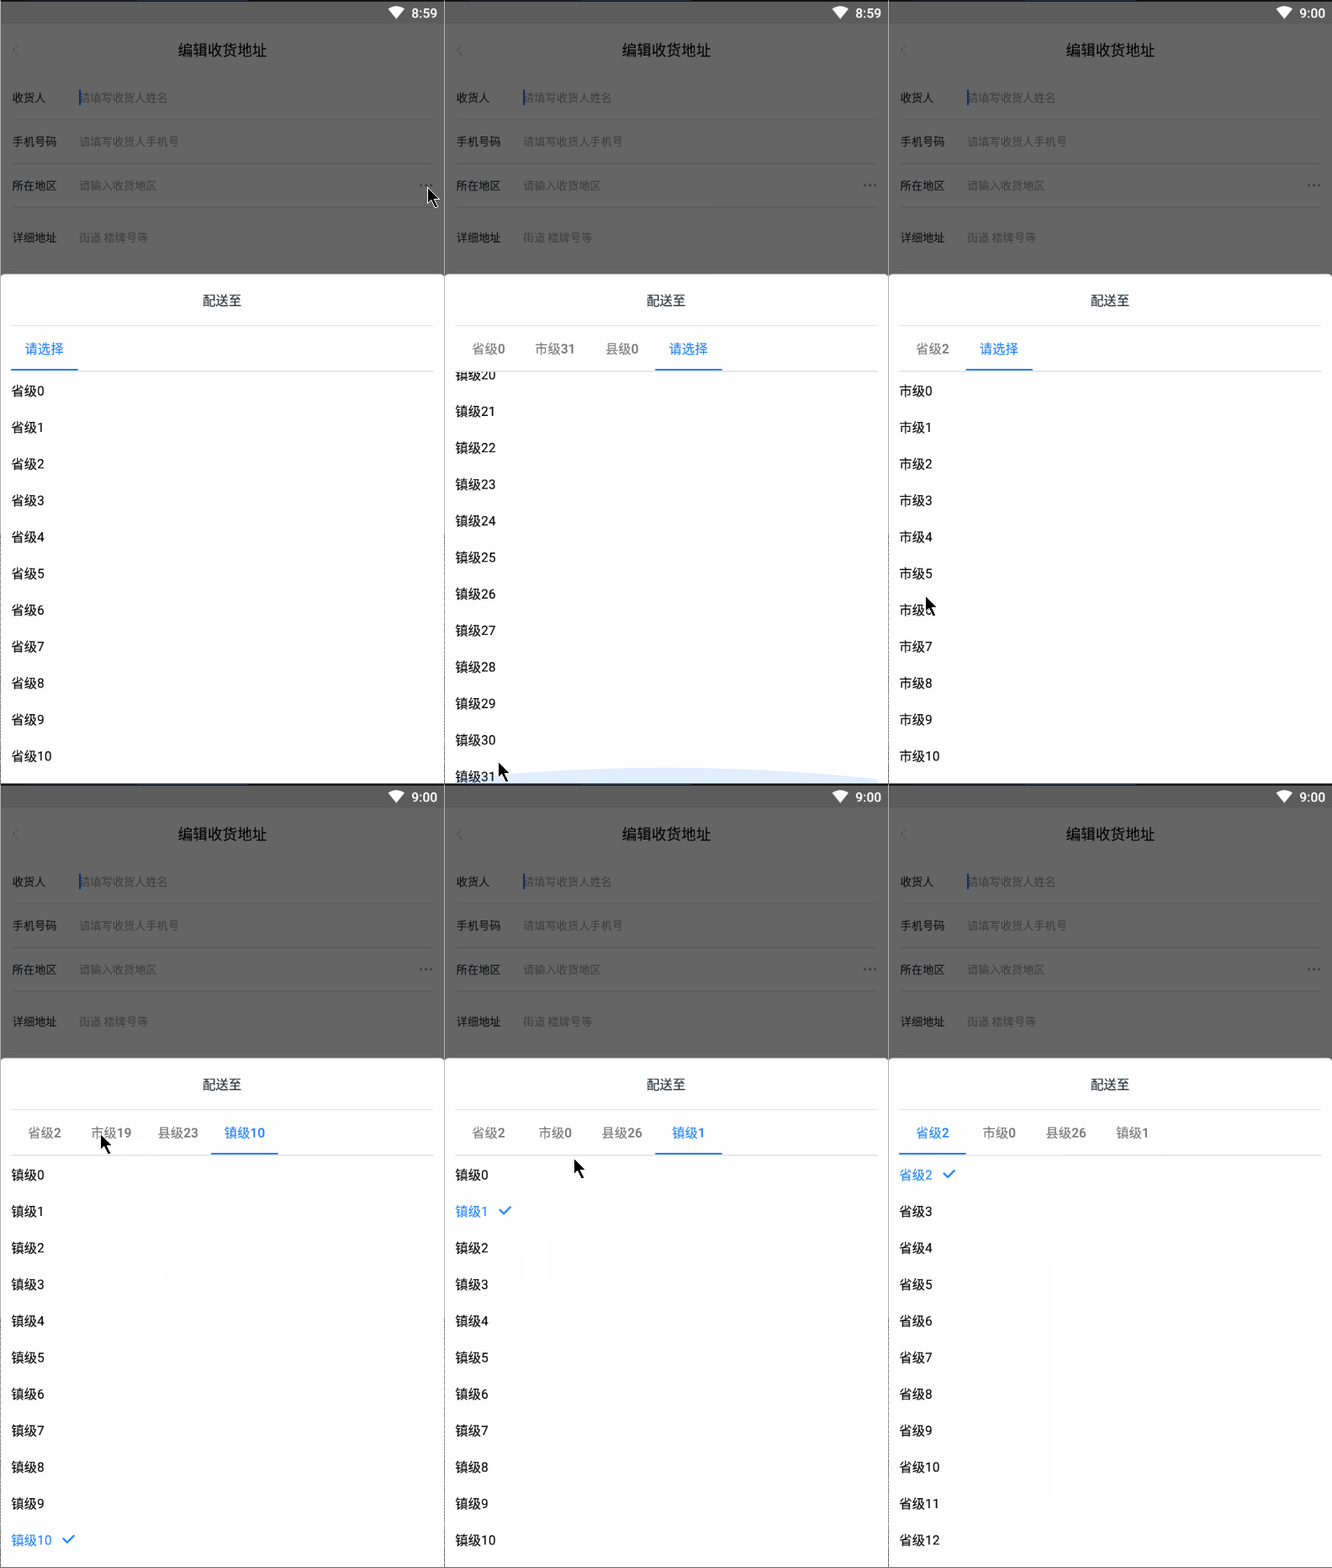
废话不多说,先上一张效果动图:
开始
- 先说说本文的一些概念。地区级别:就是比如省级,市级,县级,镇级,那么这种最多就是4级。
- 好了,我们分析一波效果图,当一个级别的地区选择好之后会创建出一个新的Tab,到了最后一个地区级别之后就不会再创建新的。如果倒回去重新选择一个级别的地区,会移除后面的Tab之后再创建一个新的Tab。选择好之后,如果点击Tab会切换到相应地区级别,并且滚动到之前选择的地区显示,创建新的Tab就默认滚动到第一个position的位置。
- 其次,来看看我们这个界面的布局:
1
2
3
4
5
6
7
8
9
10
11
12
13
14
15
16
17
18
19
20
21
22
23
24
25
26
27
28
29
30
31
32
33
34
35
36
37
38
39
40
41
<?xml version="1.0" encoding="utf-8"?>
<LinearLayout xmlns:android="http://schemas.android.com/apk/res/android"
xmlns:app="http://schemas.android.com/apk/res-auto"
android:layout_width="match_parent"
android:layout_height="560dp"
android:orientation="vertical"
android:paddingStart="12dp"
android:paddingEnd="12dp">
<!-- Dialog的标题 -->
<TextView
android:id="@+id/user_tv_dialog_title"
android:layout_width="wrap_content"
android:layout_height="wrap_content"
android:layout_marginTop="18dp"
android:layout_gravity="center_horizontal"/>
<!-- 标题下的第一条横线 -->
<View
android:layout_width="match_parent"
android:layout_height="1dp"
android:background="#e6e6e6"
android:layout_marginTop="17dp"/>
<!-- 顶部的TabLayout -->
<android.support.design.widget.TabLayout
android:id="@+id/user_tb_dialog_tab"
android:layout_width="match_parent"
android:layout_height="wrap_content"
app:tabSelectedTextColor="@color/colorPrimary"
app:tabGravity="fill"
app:tabMode="scrollable"/>
<!-- TabLayout下方的横线 -->
<View
android:layout_width="match_parent"
android:layout_height="1dp"
android:background="#e6e6e6"/>
<!-- 显示地区数据的RecyclerView -->
<android.support.v7.widget.RecyclerView
android:id="@+id/user_rv_dialog_list"
android:layout_width="match_parent"
android:layout_height="0dp"
android:layout_weight="1"/>
</LinearLayout> - 从布局中我们可以看出,我最主要靠TabLayout加RecyclerView实现这个效果,而拼多多个人猜测是TabLayout加RecyclerView加ViewPager,所以拼多多的RecyclerView是可以侧滑到上一个Tab页或下一个,这也就是和拼多多效果的不同之处。
开始撸代码
- 从代码下手,首先把单个地区列表的布局写好:
1
2
3
4
5
6
7
8
9
10
11
12
13
14
15
16
17
18
19
20
21
22
23
24
25
26
<?xml version="1.0" encoding="utf-8"?>
<LinearLayout
xmlns:android="http://schemas.android.com/apk/res/android"
xmlns:tools="http://schemas.android.com/tools"
android:layout_width="match_parent"
android:layout_height="wrap_content"
android:orientation="horizontal"
android:paddingTop="10dp"
android:paddingBottom="10dp"
tools:ignore="UseCompoundDrawables">
<!-- 显示地区名称 -->
<TextView
android:id="@+id/user_tv_address_dialog"
android:layout_width="wrap_content"
android:layout_height="wrap_content"/>
<!-- 显示后面的勾选图标 -->
<ImageView
android:id="@+id/user_iv_address_dialog"
android:layout_width="13dp"
android:layout_height="9dp"
android:src="@drawable/user_icon_address_check"
android:layout_marginStart="11dp"
android:layout_gravity="center_vertical"
android:visibility="gone"
tools:ignore="ContentDescription" />
</LinearLayout> - 把地区这个实体对象创建好:
1
2
3
4
5
6
7
8
9
10
11
12
13
14
15
16
17
18
19
20
21
22
23
24
25
26
27
28
29
30
31
32
33
34
35
36
37
38
39
40
41
public class AddressItem {
// 地区名
private String address;
// 是否勾选
private boolean isChecked;
// 地区的ID,我这边项目需要的是int型,大家可以根据自己项目需要进行修改
private int id;
public String getAddress() {
return this.address;
}
public void setAddress(String address) {
this.address = address;
}
public boolean isChecked() {
return this.isChecked;
}
public void setChecked(boolean checked) {
this.isChecked = checked;
}
public int getId() {
return this.id;
}
public void setId(int id) {
this.id = id;
}
@Override
public String toString() {
return "AddressItem{" +
"address='" + address + '\'' +
", isChecked=" + isChecked +
", id=" + id +
'}';
}
} - 把RecyclerView的适配器写好:
1
2
3
4
5
6
7
8
9
10
11
12
13
14
15
16
17
18
19
20
21
22
23
24
25
26
27
28
29
30
31
32
33
34
35
36
37
38
39
40
41
42
43
44
45
46
47
48
49
50
51
52
53
54
55
56
57
58
59
60
61
public class AddressAdapter extends RecyclerView.Adapter<AddressAdapter.MyViewHolder> {
// 保存地区数据的列表
private List<AddressItem> list = new ArrayList<>();
// 自定义的单项被点击监听事件
private ItemClickListener listener;
@NonNull
@Override
public MyViewHolder onCreateViewHolder(@NonNull ViewGroup viewGroup, int i) {
View view = LayoutInflater.from(viewGroup.getContext()).inflate(R.layout.user_item_address_bottom_sheet_dialog, viewGroup, false);
return new MyViewHolder(view);
}
@Override
public void onBindViewHolder(@NonNull MyViewHolder myViewHolder, int i) {
AddressItem item = list.get(i);
if (item.isChecked()) {
myViewHolder.tvAddress.setText(item.getAddress());
myViewHolder.tvAddress.setTextColor(Color.parseColor("#1F83FF"));
myViewHolder.ivChecked.setVisibility(View.VISIBLE);
} else {
myViewHolder.tvAddress.setText(item.getAddress());
myViewHolder.tvAddress.setTextColor(Color.BLACK);
myViewHolder.ivChecked.setVisibility(View.GONE);
}
}
@Override
public int getItemCount() {
return this.list == null ? 0 : list.size();
}
public void setList(List<AddressItem> list) {
if (this.list != null && list != null) {
this.list.clear();
this.list.addAll(list);
this.notifyDataSetChanged();
}
}
public void setOnItemClickListener(@NonNull ItemClickListener listener) {
this.listener = listener;
}
class MyViewHolder extends RecyclerView.ViewHolder {
TextView tvAddress;
ImageView ivChecked;
MyViewHolder(@NonNull View itemView) {
super(itemView);
tvAddress = itemView.findViewById(R.id.user_tv_address_dialog);
ivChecked = itemView.findViewById(R.id.user_iv_address_dialog);
if (listener != null) {
itemView.setOnClickListener(v -> listener.onItemClick(getAdapterPosition()));
}
}
}
public interface ItemClickListener {
void onItemClick(int position);
}
} - 首先自己动手写了两个BaseDialog,没什么营养,代码也很简单:
1
2
3
4
5
6
7
8
9
10
11
12
13
14
15
16
17
18
19
20
21
22
23
24
25
26
27
28
29
30
31
32
33
34
35
36
37
38
39
40
41
42
43
44
45
46
47
48
49
50
51
52
53
54
55
56
57
58
59
60
61
62
63
64
65
66
public abstract class CustomBaseDialog extends Dialog {
protected Context context;
public CustomBaseDialog(@NonNull Context context) {
super(context);
this.context = context;
}
protected abstract Integer getLayout();
protected abstract Integer getGravity();
protected abstract Integer getBackgroundRes();
protected abstract Integer getWindowAnimations();
protected abstract void initView();
@Override
protected void onCreate(Bundle savedInstanceState) {
super.onCreate(savedInstanceState);
if (getLayout() != null)
setContentView(getLayout());
Window window = getWindow();
if (window != null) {
// 去除DecorView默认的内边距,好让布局占满整个横向屏幕
View decorView = window.getDecorView();
decorView.setPadding(0,0,0,0);
if (getGravity() != null)
window.setGravity(getGravity());
else
window.setGravity(Gravity.CENTER);
if (getWindowAnimations() != null)
window.setWindowAnimations(getWindowAnimations());
if (getBackgroundRes() != null)
decorView.setBackgroundResource(getBackgroundRes());
}
initView();
}
protected void setClickListener(int id, View.OnClickListener listener) {
findViewById(id).setOnClickListener(listener);
}
}
public abstract class CustomBaseBottomSheetDialog extends CustomBaseDialog {
public CustomBaseBottomSheetDialog(@NonNull Context context) {
super(context);
}
@Override
protected Integer getGravity() {
return Gravity.BOTTOM;
}
@Override
protected void onCreate(Bundle savedInstanceState) {
super.onCreate(savedInstanceState);
Window window = getWindow();
if (null != window) {
// 去除window的margin,目的也是为了让布局占满屏幕
WindowManager.LayoutParams layoutParams = window.getAttributes();
layoutParams.width = WindowManager.LayoutParams.MATCH_PARENT;
layoutParams.horizontalMargin = 0;
window.setAttributes(layoutParams);
}
}
} - 接着才是重点,自定义地址选择器Dialog:
1
2
3
4
5
6
7
8
9
10
11
12
13
14
15
16
17
18
19
20
21
22
23
24
25
26
27
28
29
30
31
32
33
34
35
36
37
38
39
40
41
42
43
44
45
46
47
48
49
50
51
52
53
54
55
56
57
58
59
60
61
62
63
64
65
66
67
68
69
70
71
72
73
74
75
76
77
78
79
80
81
82
83
84
85
86
87
88
89
90
91
92
93
94
95
96
97
98
99
100
101
102
103
104
105
106
107
108
109
110
111
112
113
114
115
116
117
118
119
120
121
122
123
124
125
126
127
128
129
130
131
132
133
134
135
136
137
138
139
140
141
142
143
144
145
146
147
148
149
150
151
152
153
154
155
156
157
158
159
160
161
162
163
164
165
166
167
168
169
170
171
172
173
174
175
176
177
178
179
public class AddressBottomSheetDialog extends CustomBaseBottomSheetDialog {
private TabLayout tabLayout;
private AddressAdapter addressAdapter;
private int maxLevel; // 最大有多少级的地区,可以通过setMaxLevel方法进行自定义
private SparseArray<List<AddressItem>> levelList; // 级别列表数据
private SparseIntArray levelPosition; // 各个级别选中的列表position
private SparseIntArray levelIds; // 各个级别选择的地址ID
private String title; // 标题
private String tabText = "请选择"; // 新的Tab默认显示的文本
private TabSelectChangeListener changeListener; // Tab的选择被改变的监听
public AddressBottomSheetDialog(@NonNull Context context) {
super(context);
}
@Override
protected Integer getLayout() {
return R.layout.user_layout_address_bottom_sheet_dialog;
}
@Override
protected Integer getBackgroundRes() {
return R.drawable.bg_dialog_bottom;
}
@Override
protected Integer getWindowAnimations() {
return R.style.DialogBottom;
}
@Override
protected void initView() {
levelList = new SparseArray<>();
levelPosition = new SparseIntArray();
levelIds = new SparseIntArray();
((TextView)findViewById(R.id.user_tv_dialog_title)).setText(title);
tabLayout = findViewById(R.id.user_tb_dialog_tab);
final RecyclerView recyclerView = findViewById(R.id.user_rv_dialog_list);
tabLayout.addOnTabSelectedListener(new TabLayout.BaseOnTabSelectedListener() {
@Override
public void onTabSelected(TabLayout.Tab tab) {
final int position = tab.getPosition();
List<AddressItem> list = levelList.get(position);
if (null != list && !list.isEmpty()) { // 如果选中级别的List没有数据就通过执行回调来获取,否则直接复用
addressAdapter.setList(list);
final int lastClickPositon = levelPosition.get(position, -1); // 获取上一次选中的地区的position,如果找不到,默认返回-1
if (lastClickPositon >= 0) recyclerView.smoothScrollToPosition(lastClickPositon); // 如果上一次有选择,RecyclerView滚动到指定position
} else if (changeListener != null) {
// 参数position代表的当前地区级别,父级地区ID应该选当前级别的上一个级别,如果没有默认返回-1
changeListener.onSelectChange(position, levelIds.get(position -1, -1));
}
}
@Override
public void onTabUnselected(TabLayout.Tab tab) {}
@Override
public void onTabReselected(TabLayout.Tab tab) {}
});
addressAdapter = new AddressAdapter();
// 列表单项点击事件
addressAdapter.setOnItemClickListener(position -> {
final int selectedTabPosition = tabLayout.getSelectedTabPosition(); // 选中的Tab的position
levelIds.put(selectedTabPosition, levelList.get(selectedTabPosition).get(position).getId()); // 更新选中的地区的ID
changeSelect(selectedTabPosition, position);
levelPosition.put(selectedTabPosition, position); // 更新选中的地区在列表中的position
setTabText(selectedTabPosition, levelList.get(selectedTabPosition).get(position).getAddress()); // 将选中的地区的名字显示在Tab上
if (selectedTabPosition < maxLevel - 1 && selectedTabPosition == tabLayout.getTabCount() - 1) { // 如果没达到MaxLevel并且选中的Tab是最后一个就添加一个Tab,并且RecyclerView滚动到最顶部
tabLayout.addTab(createTab(), true);
recyclerView.smoothScrollToPosition(0);
}
});
recyclerView.setLayoutManager(new LinearLayoutManager(context));
recyclerView.setAdapter(addressAdapter);
tabLayout.addTab(createTab(), true); // 默认添加一个Tab
}
// 创建一个请选择的tab并返回
private TabLayout.Tab createTab() {
return tabLayout.newTab().setText(tabText);
}
// 当点击了RecyclerView条目的时候执行的方法
private void changeSelect(int selectedTabPosition, int nowClickPosition) {
// 保存下来的当前列表上一个点击位置.如果找不到该值,默认返回-1
final int lastPosition = levelPosition.get(selectedTabPosition, -1);
// 如果上一个点击位置和下一个点击位置相同,则不做改变
if (nowClickPosition == lastPosition) {
return;
}
// 如果不是最后一个并且又重新选择了级别地区,移除后面的Tab
final int count = tabLayout.getTabCount();
// 这里要倒过来移除Tab,不然会出现这样的情况,假如你有四个Tab,你移除第0个,接着移除第一个的话,第一个不是原来的第一个。因为你把第0个移除,原来的第一个就到了第0个的位置上。所以倒过来移除是明智的做法
if (selectedTabPosition < count - 1) {
TabLayout.Tab nowTab = tabLayout.getTabAt(selectedTabPosition);
if (null != nowTab) nowTab.setText(tabText);
for (int i = count - 1; i > selectedTabPosition; i--) {
// 将相应地区级别的列表数据移除
levelList.remove(i);
// 将之前选中的position重置为-1
levelPosition.put(i, -1);
// 将之前记录的地区ID重置为-1
levelIds.put(i, -1);
tabLayout.removeTabAt(i);
}
}
// 将现在选择的地区设置为已经选中
levelList.get(selectedTabPosition).get(nowClickPosition).setChecked(true);
// 通过adapter更新列表单个对象
addressAdapter.notifyItemChanged(nowClickPosition);
if (lastPosition >= 0) {
// 将上一个选中的地区标记为未选中
levelList.get(selectedTabPosition).get(lastPosition).setChecked(false);
// 通过adapter更新列表单个对象
addressAdapter.notifyItemChanged(lastPosition);
}
}
// 设置第几个tab的文字
private void setTabText(int tabPosition, String text) {
TabLayout.Tab tab = tabLayout.getTabAt(tabPosition);
if (null != tab) tab.setText(text);
}
// ----------------------------- 以下是对外公开方法与接口 --------------------------
/**
* 设置Dialog的标题
* @param title 标题文字
*/
public void setDialogTitle(String title) {
this.title = title;
}
/**
* 设置在当前tab下还未选择区域时候tab默认显示的文字
* @param tabDefaultText 默认显示的文字
*/
public void setTabDefaultText(String tabDefaultText) {
this.tabText = tabDefaultText;
}
/**
* 设置地址最大级别(如:省,市,县,镇的话就是最大4级)
* @param level 最大级别
*/
public void setMaxLevel(int level) {
this.maxLevel = level;
}
/**
* 设置当前级别列表需要显示的列表数据
* @param list 列表数据
* @param level 地区级别
*/
public void setCurrentAddressList(List<AddressItem> list, int level) {
levelList.put(level, list);
addressAdapter.setList(list);
}
/**
* 设置Dialog中Tab点击切换的监听
* @param listener tab切换监听实现
*/
public void setTabSelectChangeListener(@NonNull TabSelectChangeListener listener) {
this.changeListener = listener;
}
/**
* 自定义的Tab切换监听接口
*/
public interface TabSelectChangeListener {
void onSelectChange(int level, int parentId);
}
} - 使用方法:
1
2
3
4
5
6
7
8
9
10
11
12
13
14
15
16
17
18
19
20
21
22
23
24
25
26
27
28
29
30
31
32
33
34
private void init() {
mDialog = new AddressBottomSheetDialog(this);
mDialog.setDialogTitle("配送至");
mDialog.setMaxLevel(4);
mDialog.setTabDefaultText("请选择");
mDialog.setTabSelectChangeListener((level, parentId) ->
mDialog.setCurrentAddressList(requestAddress(level, parentId), level)
);
binding.userIvSelectAddress.setOnClickListener(v -> mDialog.show());
}
private List<AddressItem> requestAddress(int level, int parentID) {
List<AddressItem> list = new ArrayList<>();
String levelTxt = "未知";
switch (level) {
case 0:
levelTxt = "省级";
break;
case 1:
levelTxt = "市级";
break;
case 2:
levelTxt = "县级";
break;
case 3:
levelTxt = "镇级";
}
for (int i = 0; i < 32; i++) {
AddressItem item = new AddressItem();
item.setChecked(false);
item.setAddress(levelTxt + i);
list.add(item);
}
return list;
}总结
虽然上面的代码已经有很详细的注释,但是还是有一些东西没细讲,比如SparseArray是什么等等。 - SparseArray是什么?SparseArray后面需要一个泛型,SparseArray
,可以理解为是HashMap<Integer, T>。但是为什么不用HashMap而使用这个东西?SparseArray是谷歌专门为安卓打造的Map,优点是省内存,占用内存没HashMap大。之前我的做法是省级列表数据一个list,市级一个list。。。这种写法,不但耦合度高,用户也不能自定义最大的地区级别是多少,而且在写法过程中少不了各种switch判断。后来灵机一动,Tab选中的position就是代表的一个级别,直接通过Map来取对应级别的list出来不就好了。 - SparseIntArray是什么?其实它就相当于SparseArray
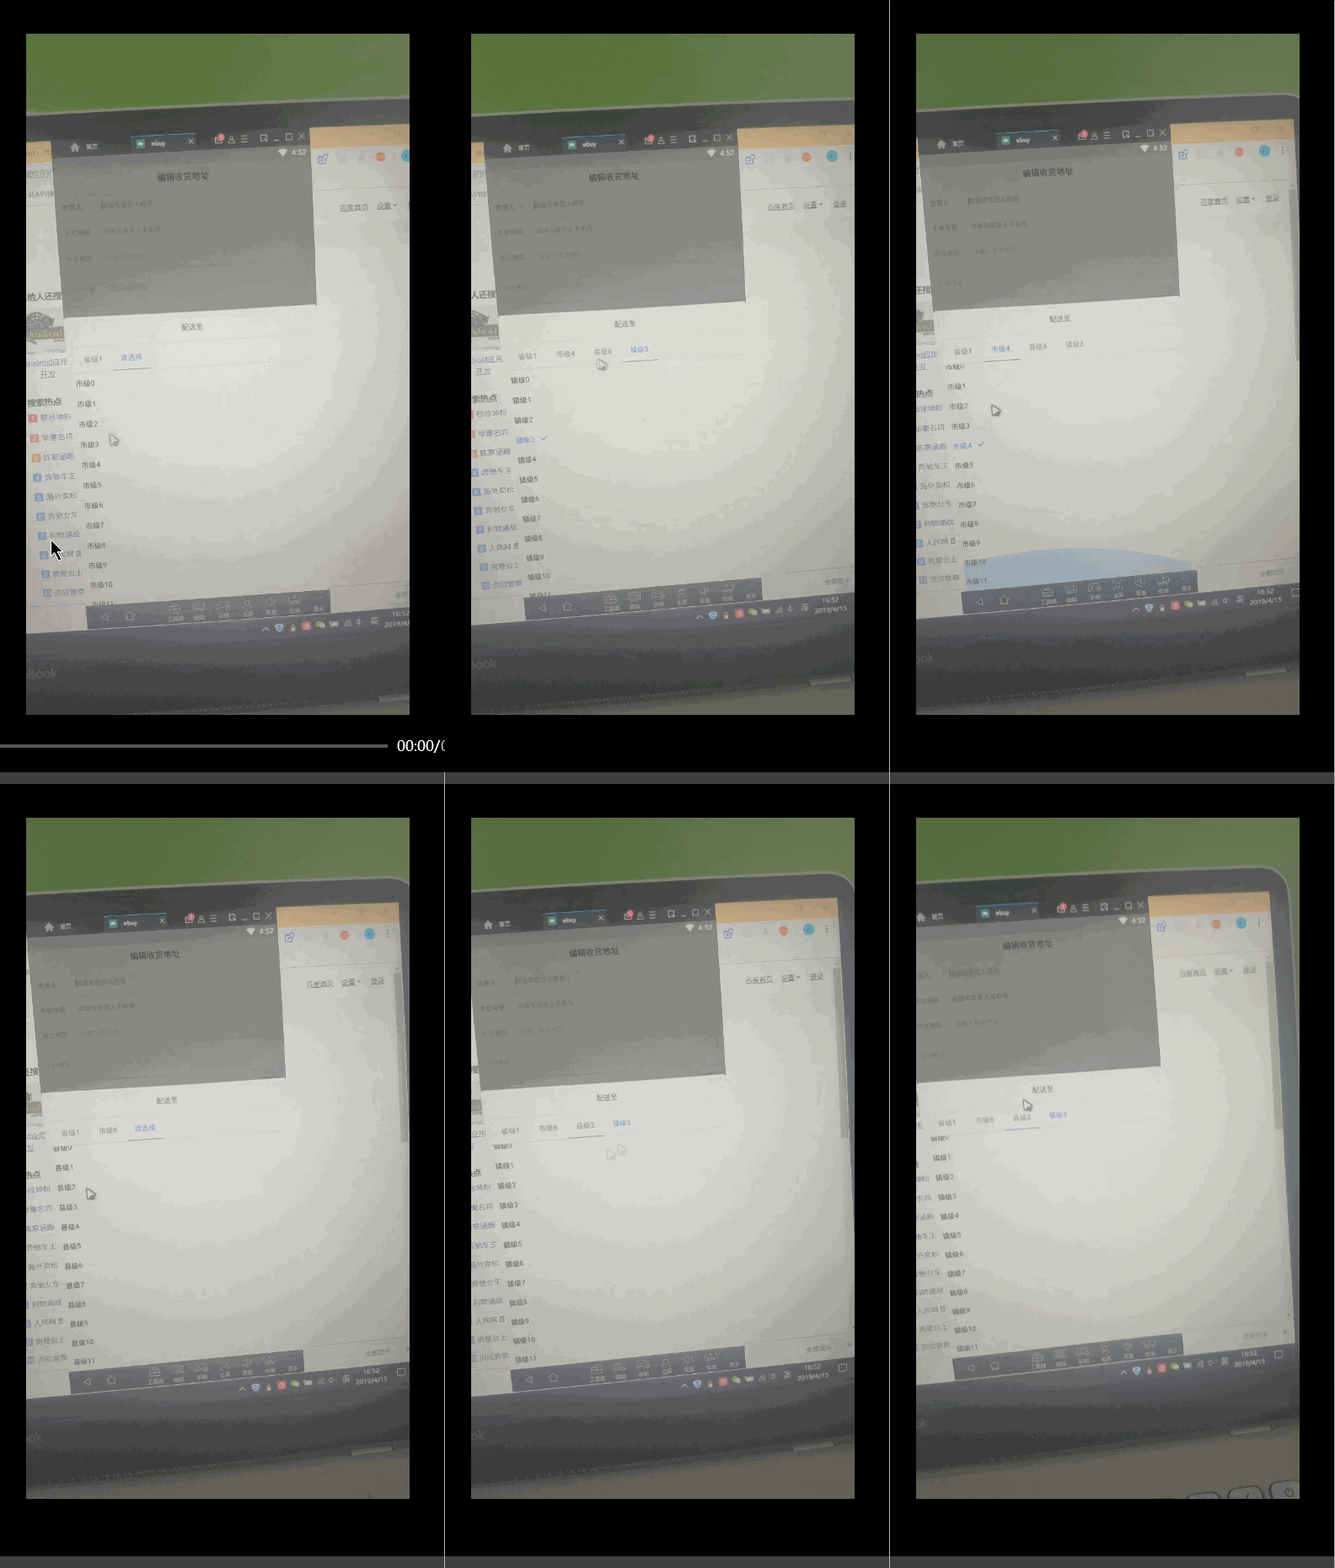
,谷歌还为我们封装了其他基本数据类型的SparseArray,它们就是SparseBooleanArray和SparseLongArray,用法都是相似的。 - 为什么不使用一个成员变量来记录当前选中的tab的position,然后在onTabSelected中更新该成员变量?之前我是这么做的,但是会出奇怪的问题:在市级重新选择之后,移除后面的tab后再重新选县级之后,TabLayout的横线不会移动到镇级上了。不知道什么原因造成的,猜测可能是onTabSelected触发时机造成选中的Tab的position更新不及时。如果有知道的旁友还望不吝赐教。如下图:

20190422更新
- 将AddressItem中的ID修改为Object类型,以适配不同业务数据,其他地方也进行了相应的修改
- 添加全部地区选择完成结果回调事件
- 修改一些代码逻辑,有兴趣改善的请Pull request